This specifically deals with how to create a header on your blog with a cool picture frame. The frames I’ve used in the past can be found here: http://www.shabbyblogs.com/extra.html
Once you find the frame you like and have downloaded it and saved it on your computer, here’s what you’ll do (assuming you have access to Photoshop):
Step 1:
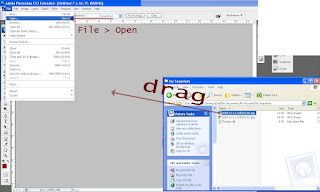
Import your frame into Photoshop. You can do this at least 3 different ways.
1) In Photoshop, File > Open, find the picture and open it.
2) Right+Click on your picture, select Open With… > Photoshop.
3) Open Photoshop, then take the file and drag it right into photoshop.
Step 2:
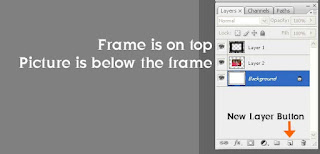
Create a new layer by clicking the new layer button (see picture). A quick explaination of how the layers work in Photoshop:
It’s actually like pile of papers. The higher in the list it is, the closer to the top of the stack the objects in that layer will be. SO, if you want the frame to be on top of something else, like your picture, you’ll have to click and drag it higher in the list.
Step 3:
Import the picture you want to use into Photoshop (using one of the same import methods from step 1)
Step 4:
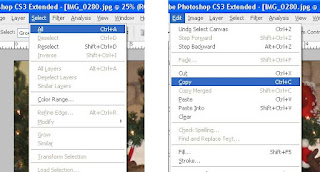
Now, select the entire picture and copy it. You can select all by going Select > All or CTRL+A on the keyboard. Then copy – either by Edit > Copy or CTRL+C on the keyboard.
<>
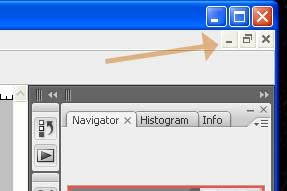
Step 5: Go back to the window with the picture frame. You may have to CTRL+TAB to get there (you can also minimize your current window with the smaller minimize button below the program open and close button. Then paste the picture in the new layer I had you create in step 2 by going to Edit > Paste OR typing CTRL+V on the keyboard.
<>
Step 5:
You’ll notice at this point that the picture is HUGE compared to the frame, or it might just not be the right size to fit the frame. There are various ways to do this, but I’ve found this way to be fastest and easiest:
Make sure you are still working with the Picture Layer (look at the layers area and see which one is selected, it will be darker than the others). If the layer is selected, Go to Edit > Free Transform OR CTRL+T. This will then put a box around the picture:
<>
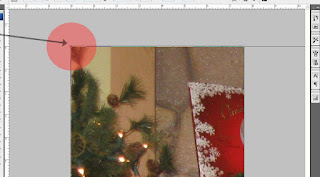
Holding down the SHIFT key, click and drag the square to make the picture smaller or larger as needed. You may have to make it smaller, move it up and then move it smaller again. Then press Enter so the picture will stay the new size.
Step 6:
Once you get it to the right size, you need to put it behind the frame so it will look<>
 like it’s inside the picture frame. To do this, go again to the Layers window and click and drag the photo layer so it’s below the frame layer. Then using the Arrow (with cross hairs) tool, move the picture to right where you want it.
If you want to add text, just click on the T tool, click about where you want it on the page, and<>
 then type it. If you only see a line and no text, just move the text layer on top of the other layers (in the layers window). You can change the font and color of your text at the toolbar at the top of the screen (below the menus).

No comments:
Post a Comment